Cheap Backpacking Gear That Actually Works (And Upgrades Your Trip)
Nothing ruins a backpacking trip faster than realizing your $300 jacket didn’t keep you warm—or dry. Meanwhile, the $10 foam pad you nearly left behind ends up saving the day.
Expensive doesn’t always mean better. In fact, some of the best backpacking upgrades I’ve made cost under $25—and they’ve had a bigger impact on comfort, safety, and efficiency than any premium gear ever did.
There’s a common misconception that budget gear = poor quality, but smart backpackers know better. Many cheap backpacking gear items are ultra-light, durable, and incredibly effective.
Before we dive in, grab my Free Backpacking Gear Checklist—it’s packed with essential, affordable items you can rely on for any trip.
Prefer to watch instead? Check out my full YouTube breakdown here. I cover each piece of gear in action.
Disclosure: This post contains affiliate links. As an Amazon Associate, I earn from qualifying purchases. I only recommend products I use and trust.
Why budget gear often outperforms high-end gear
Some gear is just simple by nature. A $3 pack liner can outperform a $60 rain cover. A $20 pair of gaiters might prevent more blisters than your fancy trail runners.
Cheap doesn’t mean junk—it often means efficient.
When to invest vs. when to save
Save on lightweight accessories like sit pads, gaiters, stuff sacks, and liners.
Invest in boots, shelter, and your sleep system—gear where comfort and safety matter most.
Need help deciding? Check out my Backpacking Gear Guide or my Standard Gear List for a full breakdown.
Dirty Girl Gaiters: The Foot-Saving Upgrade You Didn’t Know You Needed
Ever stopped mid-hike to shake out your shoe—only to find a tiny rock quarry inside your sock? Yeah. Not fun.
Whether you’re hiking through desert sand, muddy trails, or pine-needle-covered forest floor, trail debris always finds a way into your shoes. And once it’s in there? You’re stuck with gritty socks, hot spots, and eventually, full-blown blisters. That’s why Dirty Girl Gaiters are one of the smartest pieces of cheap backpacking gear you can add to your kit.
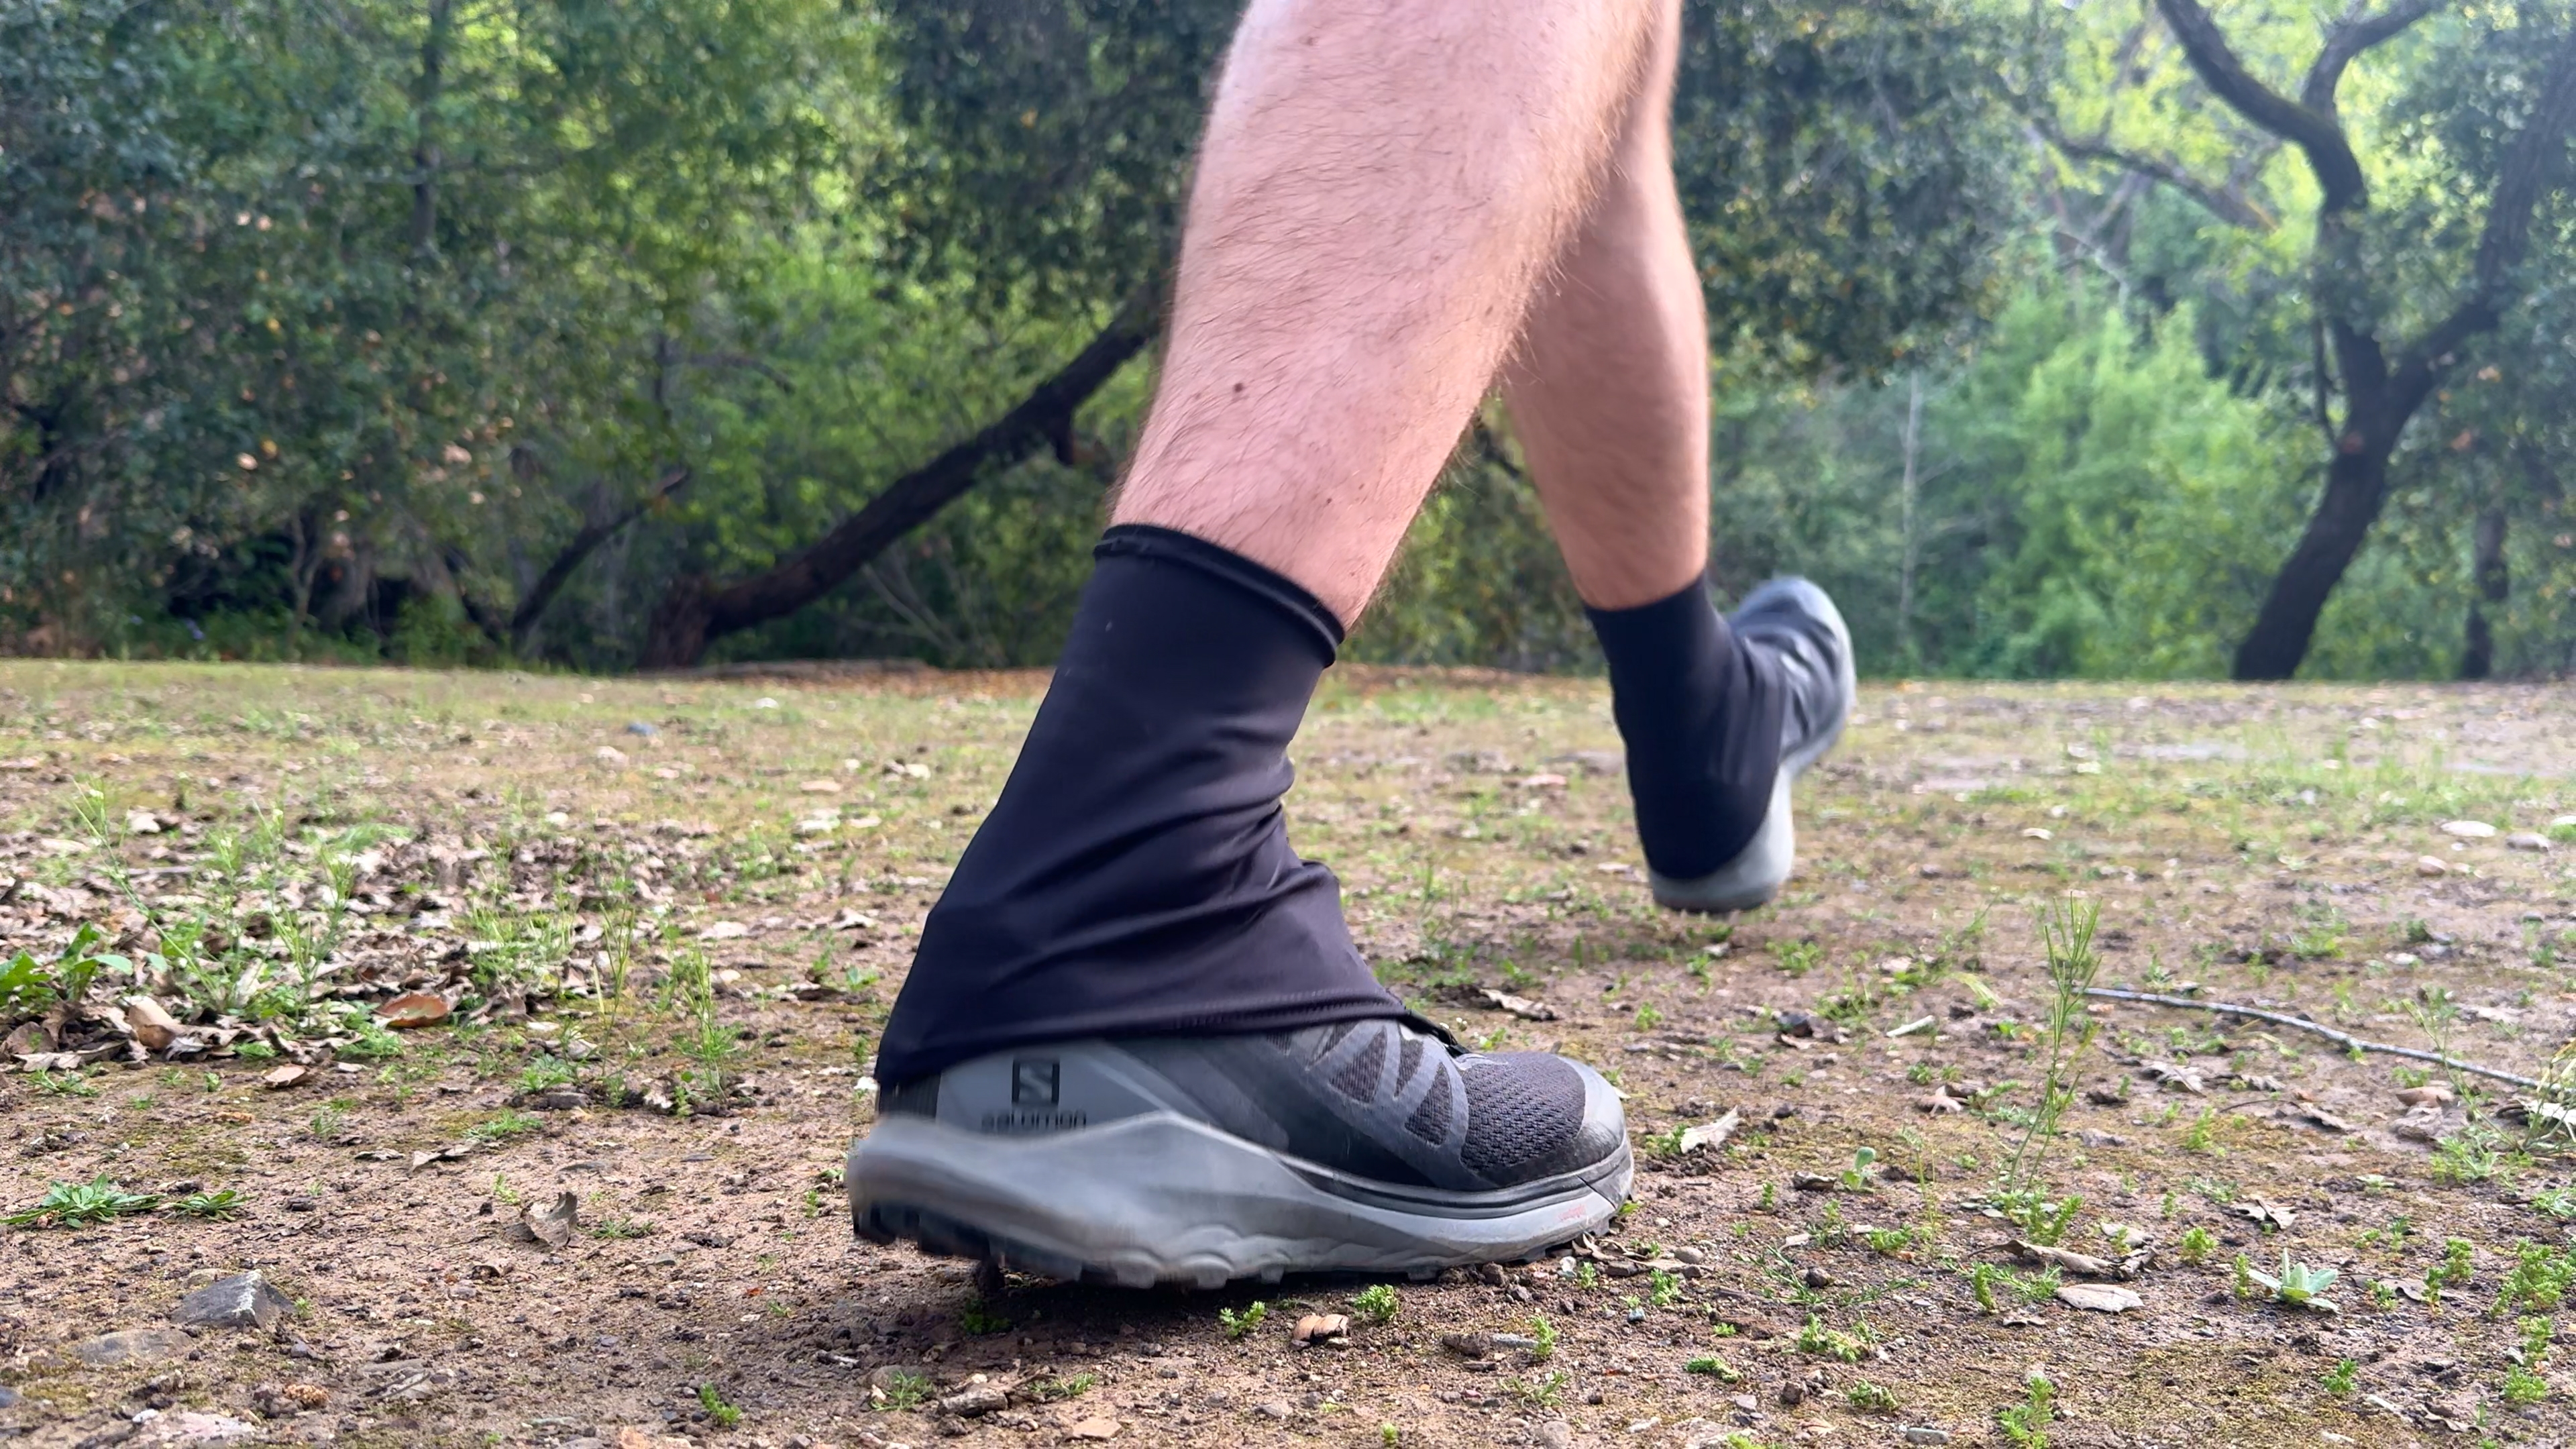
These ultralight gaiters are designed to cover the vulnerable gap between your shoes and ankles, creating a snug barrier that blocks gravel, dirt, sand, and twigs from ever making contact with your feet. They attach using a strip of Velcro on your shoe’s heel and a small front hook that clips onto your laces. Once they’re in place, you barely notice them—they add no heat, no weight, and zero bulk.
How gaiters work and why they’re worth it
Gaiters are shockingly simple. Slip them over your shoes, hook them to the laces, and boom—your feet stay clean and protected.
They:
- Keep socks drier and cleaner
- Prevent mid-hike shoe shakeouts
- Reduce friction and blister risk
- Add comfort without weight or heat
All of that for less than $25? It’s a no-brainer. Dirty Girl Gaiters are also built to last, even if you hike rough terrain every weekend.
Style, comfort, and performance in one cheap upgrade
Function matters, but hey—so does style. Dirty Girl Gaiters come in dozens of wild patterns (think skulls, flamingos, tie-dye, and unicorns), plus subtle options like plain black. Whether you want to stand out on the trail or keep things low-key, you’ve got options.
And here’s the bonus: Dirty Girl Gaiters is a female-run brand that’s been trusted by ultralight hikers for years. If you’re looking for a low-cost gear upgrade that actually improves foot comfort, these are one of the best value purchases you can make.
Still building your gear kit? Make sure to grab my Free Beginner Backpacking Gear Checklist to avoid overpriced mistakes.
Waterproofing That Works: Why a Pack Liner Beats a Rain Cover
Rain happens. Sometimes it’s a light drizzle. Other times, it’s a full-blown, trail-flooding storm. But no matter how it hits, one thing’s for sure: a soaked sleeping bag can absolutely ruin your trip—or put you in danger.
That’s why I never rely solely on pack covers. Instead, I use a simple, cheap pack liner—like a Nylofume bag or a trash compactor bag—to create an internal waterproof barrier that actually works.
Unlike external pack covers, a liner seals moisture out from the inside, keeping your gear dry even when rain’s blowing sideways or your pack sits on wet ground.
Why pack covers fail when it really matters
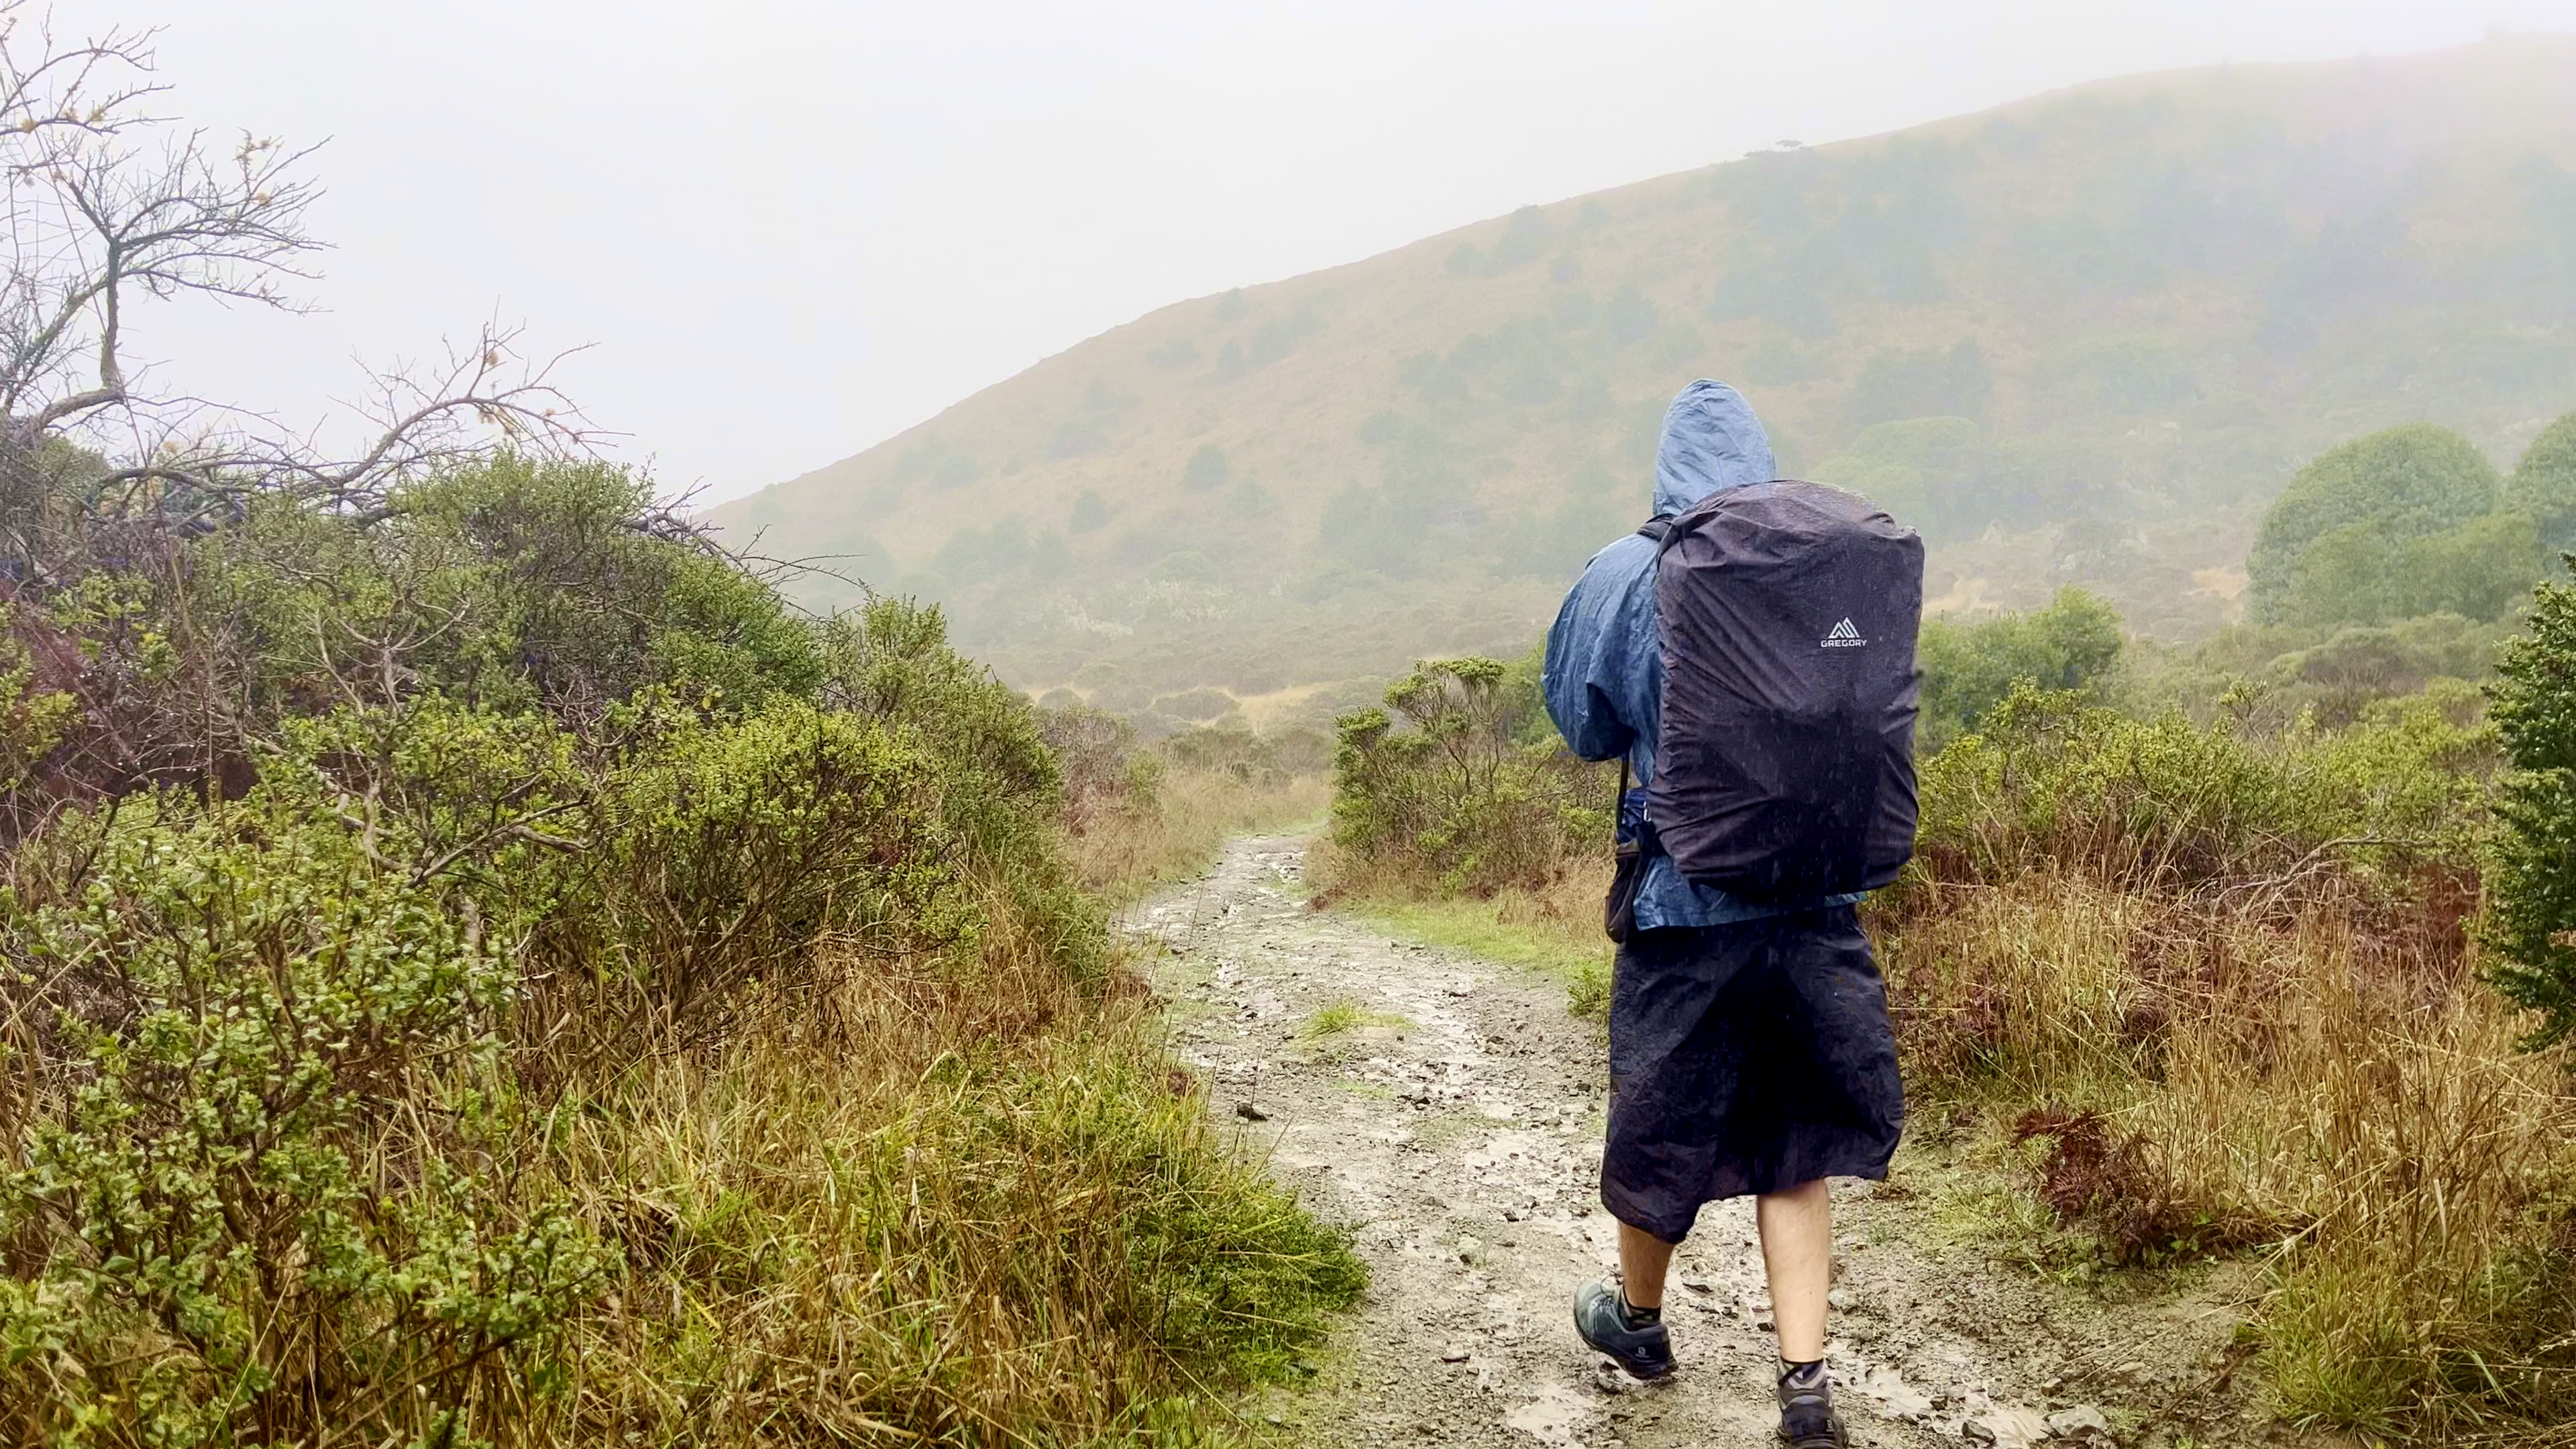
Pack covers only protect the outside of your pack. But rain still seeps in through shoulder straps, zippers, seams, and the back panel. And if you set your pack down on soggy terrain, water can soak straight through the bottom.
In short: covers don’t seal the inside—liners do.
How a cheap liner protects critical gear
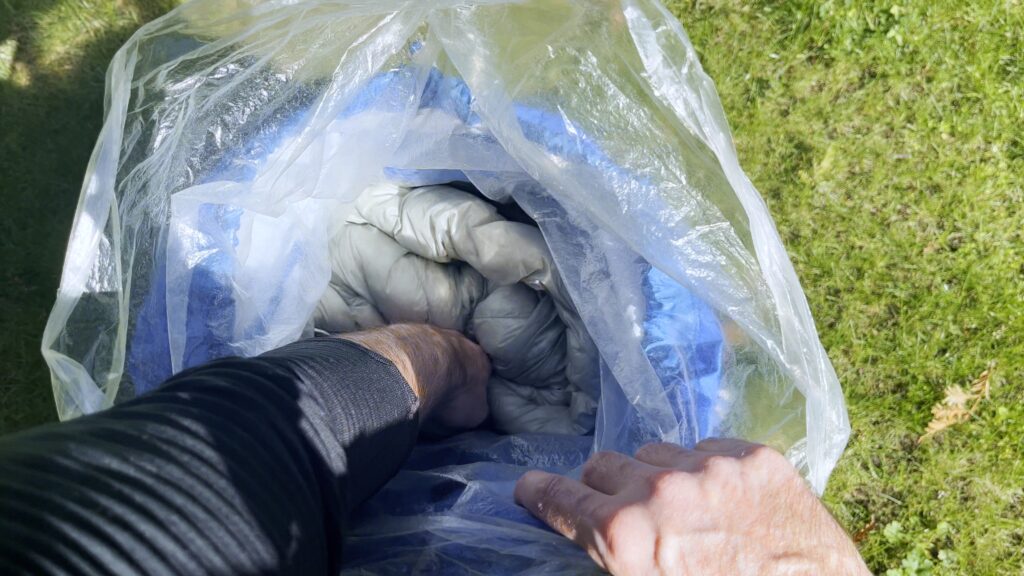
With a $3 liner, you can keep your quilt, extra clothes, electronics, and food 100% dry, even in a downpour or after a river crossing.
It adds almost no weight, fits inside any pack, and lasts for multiple trips. And unlike most rain covers, it actually works in real-world conditions.
My exact waterproofing setup
I use one Nylofume liner for the main pack and a second small liner for my quilt and sleep clothes. This double-layered approach means zero wet gear, zero regrets, even in the worst weather.
For more details on this system, check out my full Ultralight Gear List.
Whether you’re heading into a humid forest or planning a high-altitude trek where storms roll in fast, a cheap pack liner is one of the smartest, lightest, and most effective upgrades you can make.
Foam Sit Pads: The $10 Luxury That Changes Everything
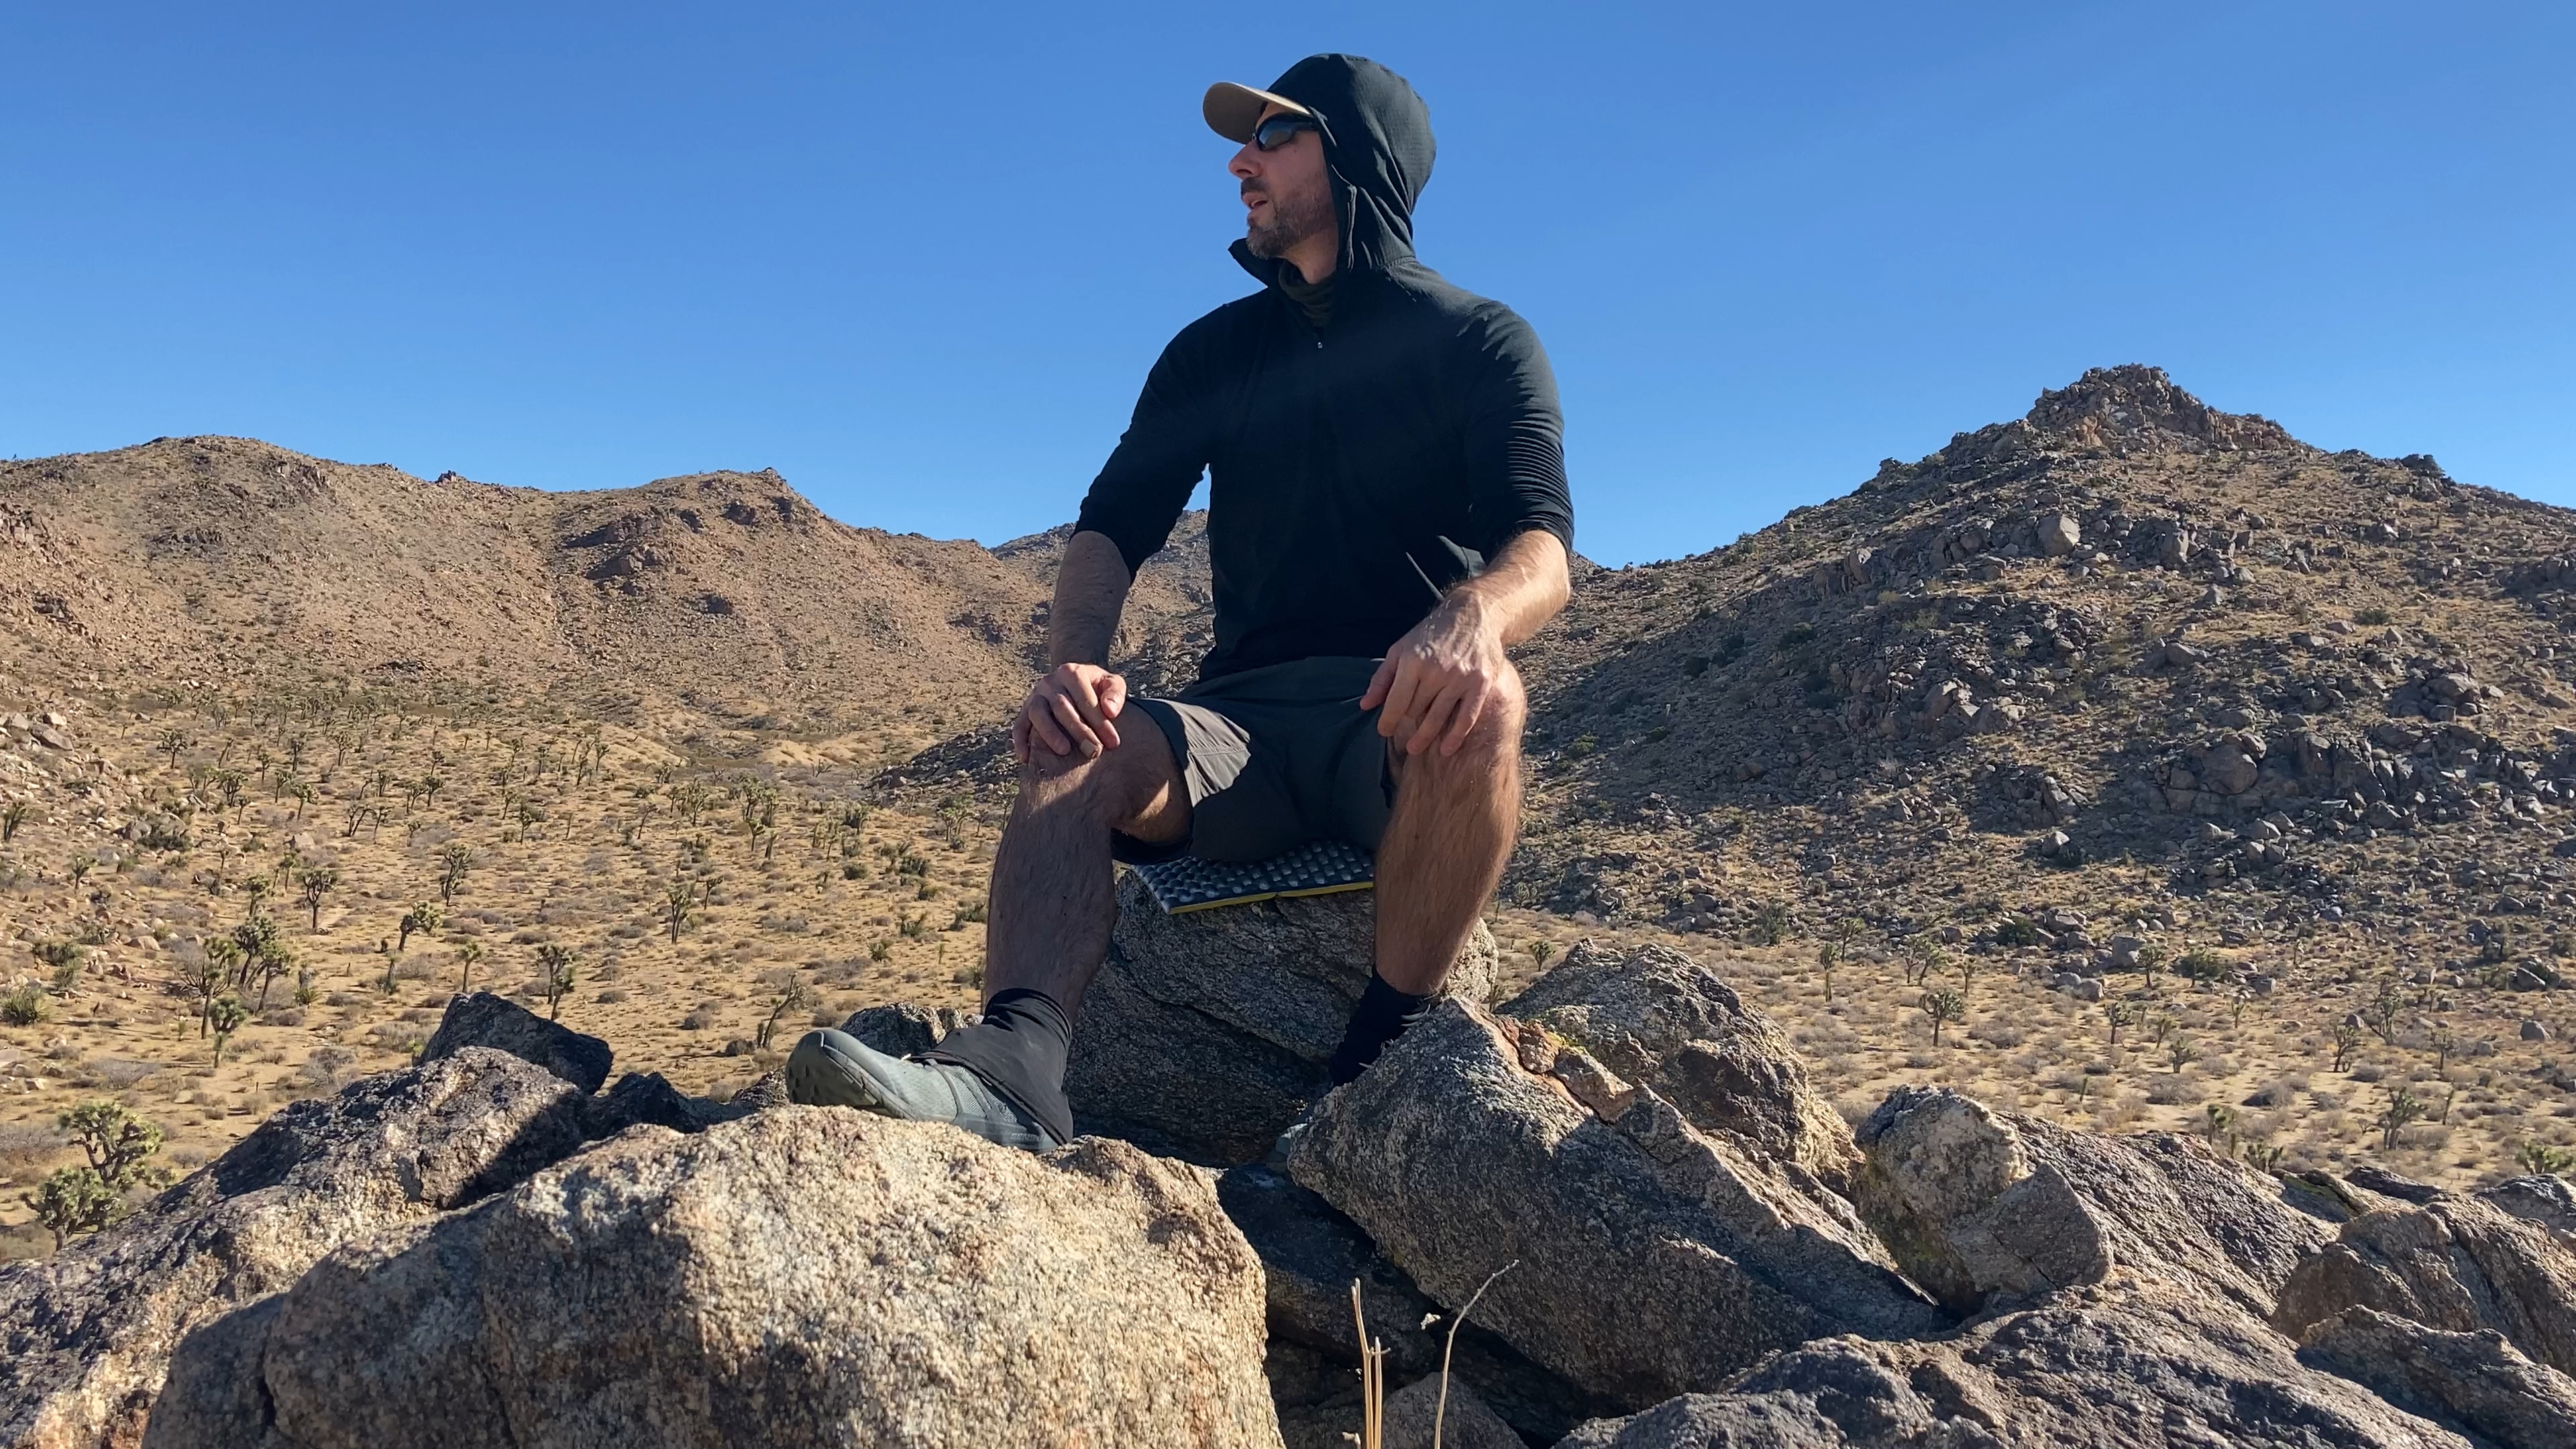
Break time. You’re tired. The trail’s been rough, your knees ache, and the ground? Cold, damp, and jagged. Do you sit? Or do you suffer?
Bring a foam sit pad, and you’ll never ask that question again.
These compact, ultralight pads fold or roll into your pack and weigh next to nothing—but they deliver real comfort where it matters most. Whether you’re grabbing a quick snack, filtering water, or prepping dinner at camp, having a clean, dry, cushioned spot to sit makes a surprisingly big difference—especially on long days.
Not just for breaks—sit pad uses you didn’t expect
The beauty of a sit pad is in its versatility.
- Filtering water at a muddy creek? Toss it down and avoid kneeling in the muck.
- Cooking on wet ground? Use it to keep your gear clean and dry.
- Need a dry spot for a midday nap or yoga stretch? Boom—sit pad.
Once you start carrying one, you’ll find yourself reaching for it constantly—often five or six times a day.
How a foam pad adds warmth under your sleep system
It’s more than just daytime comfort. At night, slide your foam pad underneath your inflatable sleeping pad for an extra layer of ground insulation. If you’ve ever woken up with freezing toes or a chilled back, this tiny upgrade might be the fix you’ve been missing.
Ultralight hikers even cut down closed-cell foam pads to torso length for multi-purpose use—sit pad by day, warmth booster by night.
Sit pad vs. camp chair: weight and value comparison
Here’s the deal:
- Sit pad = weighs just ounces, costs ~$10, and takes up minimal space.
- Camp chair = weighs over a pound, costs $100+, and adds bulk.
Unless you’re prioritizing lounge-style comfort, the sit pad is a smarter choice for backpackers focused on performance, weight savings, and cost.
Want more practical upgrades like this? Don’t miss my guide on Beginner Backpacking Mistakes—not bringing a sit pad is definitely one of them.
Sea to Summit Dry Bags: Ultralight Organization That Saves Time
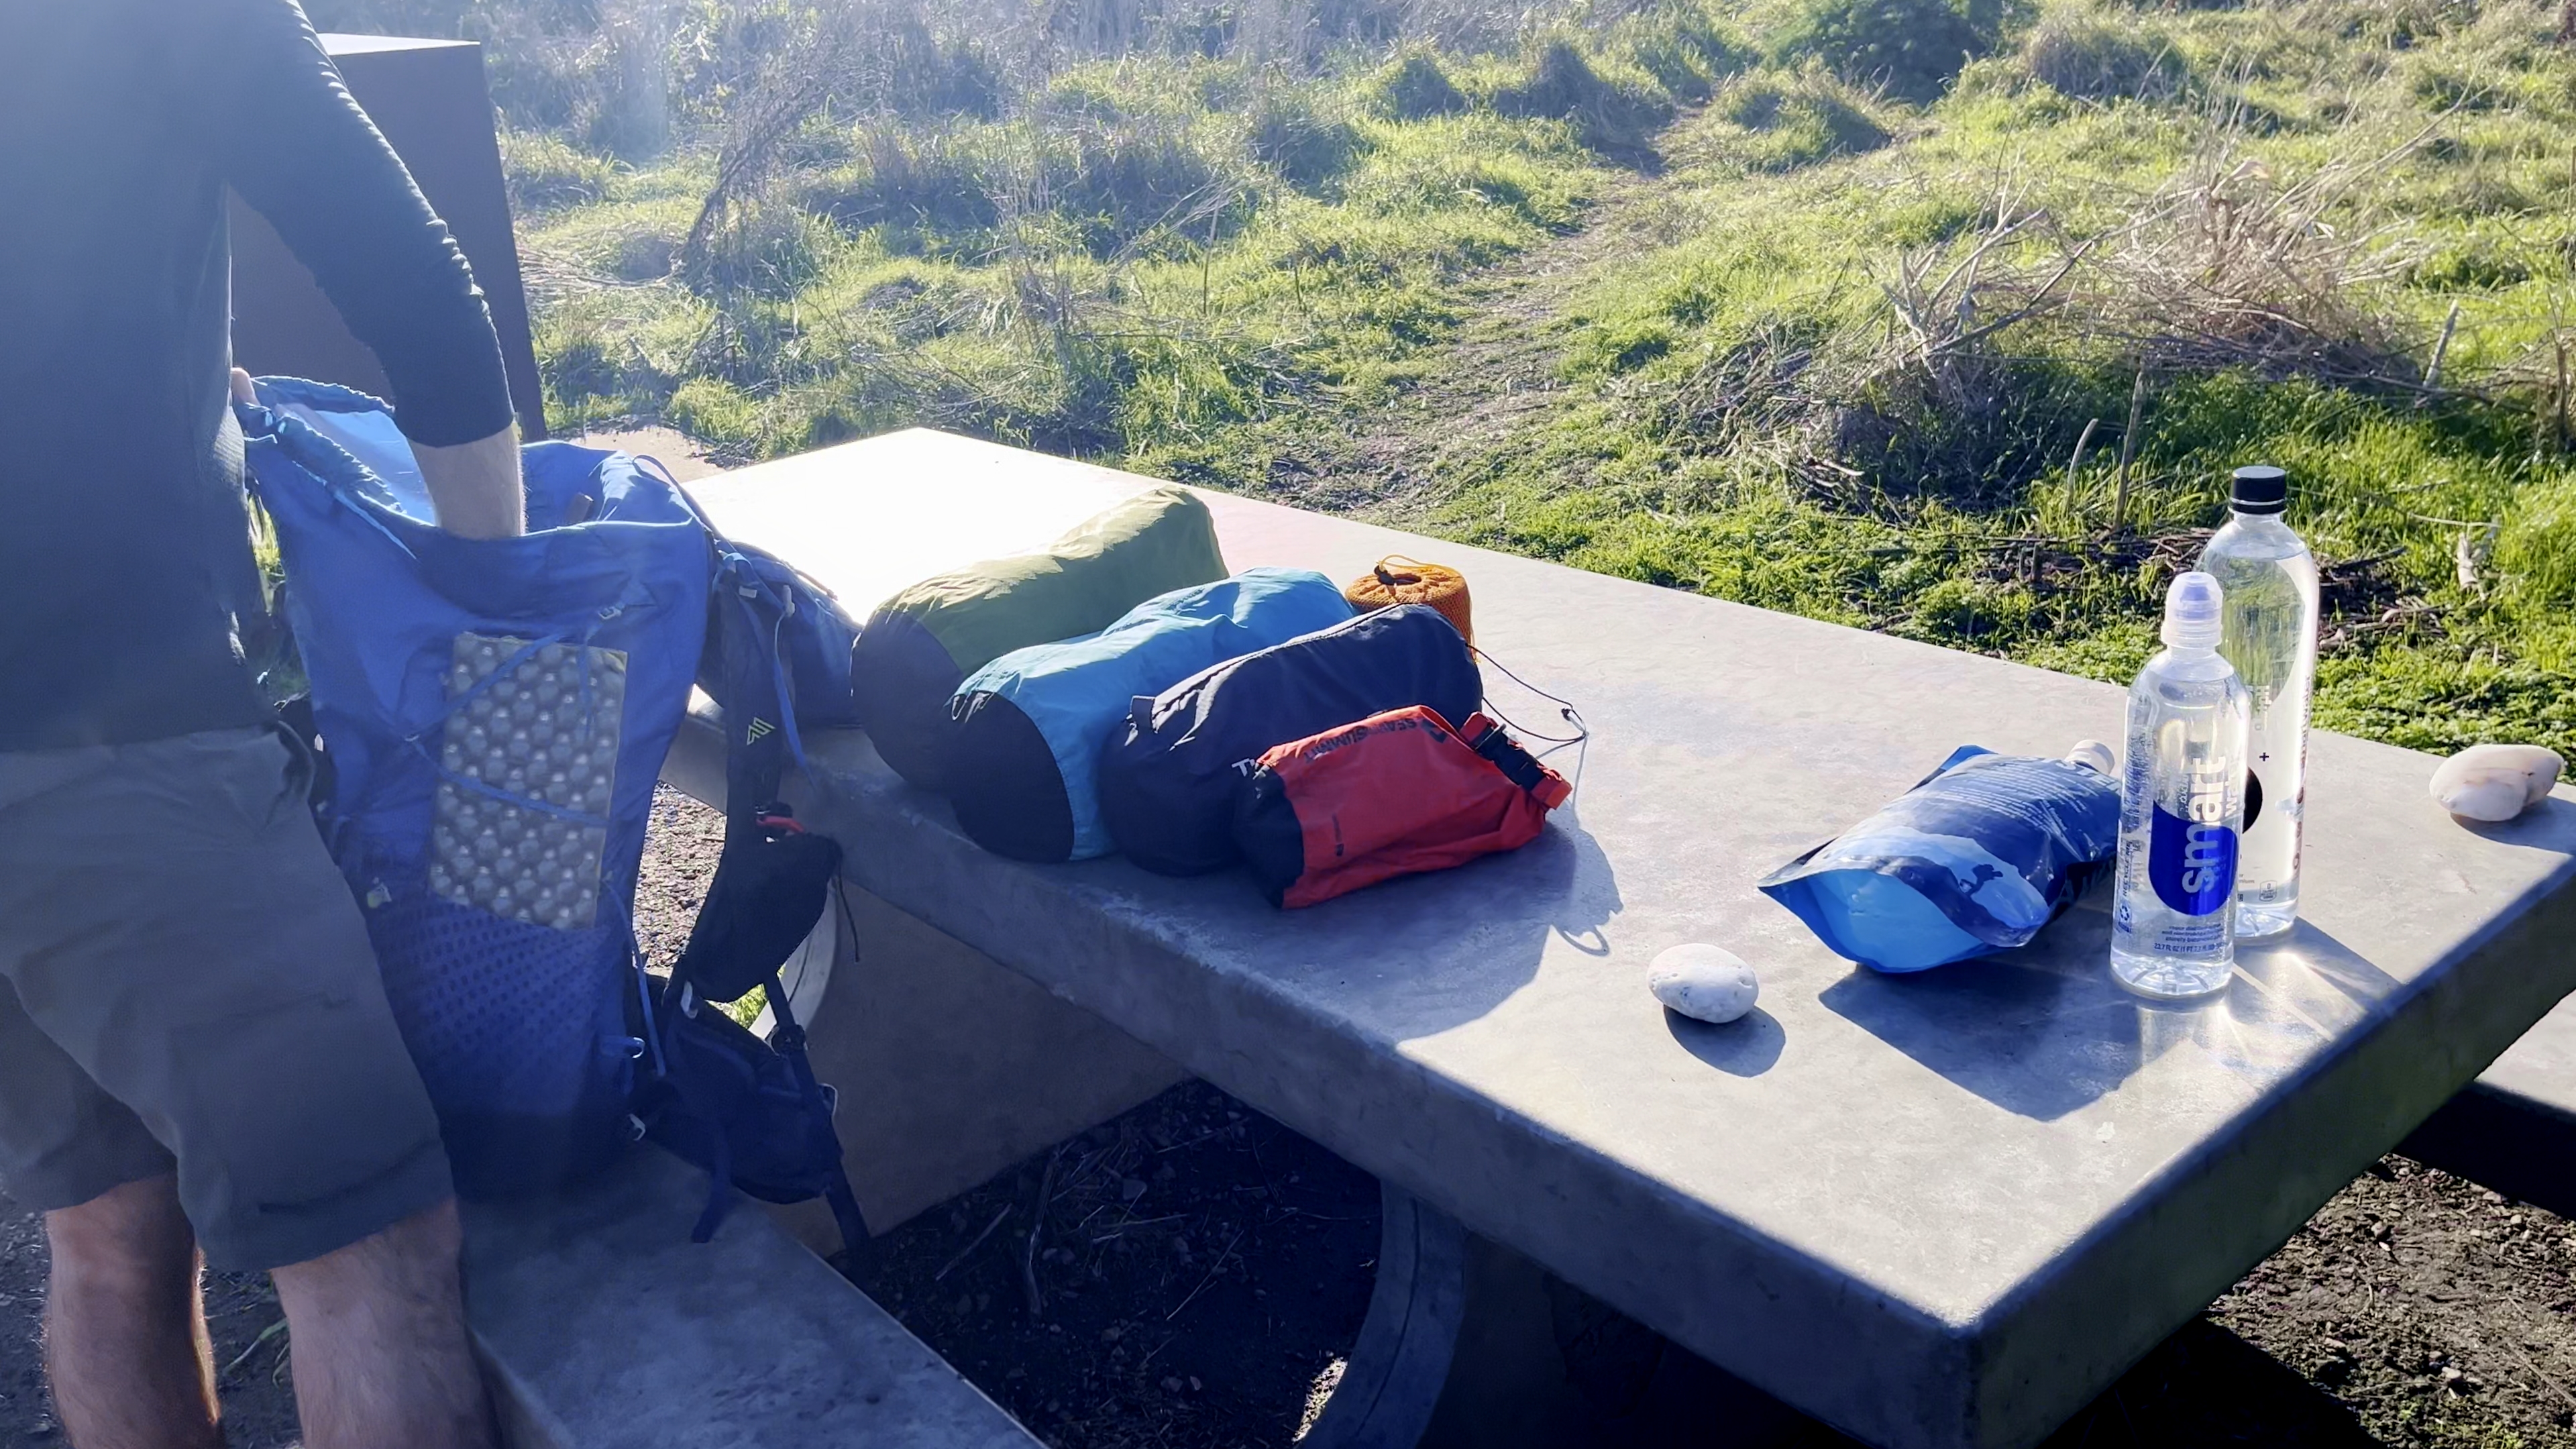
Nothing kills morale like digging through a chaotic pack in the dark just to find your headlamp. Or worse—realizing your spare socks are soaked because your stuff sack didn’t seal properly.
That’s where Sea to Summit dry bags come in. These ultralight, waterproof bags are a game-changer for backpackers who want to keep gear dry, organized, and fast to access. Whether you’re carrying your quilt, toiletries, electronics, or snacks, there’s a perfect size and style to match.
I use multiple Sea to Summit dry bags in every pack I carry, and I wouldn’t hike without them.
Why gear organization matters more than you think
In the backcountry, every second counts—especially when you’re cold, tired, or trying to beat an incoming storm. The last thing you want is to waste time digging for your water filter or headlamp at the bottom of your pack.
Organized gear not only saves time but also reduces stress and protects your essentials. Color-coded dry bags let you reach exactly what you need without unpacking your whole system.
Plus, they keep your gear dry from rain, condensation, or creek crossings—a must for any multi-day trip.
My recommended sizes and systems
Here’s how I personally use Sea to Summit dry bags for backpacking:
- 13L – Ideal for clothes or your sleep system (like a quilt or puffy)
- 8L – Perfect for food or bulky layers
- 2L–5L – Great for toiletries, electronics, first aid, or snacks
- 1L – Handy for storing cords, meds, or a lighter
Pro tip: Use different colors or label each bag so you can grab the right one instantly.
Which Sea to Summit dry bags are best for backpacking?
Not all dry bags are created equal. Here’s a breakdown of the most backpacker-friendly models:
- Ultra-Sil Nano Dry Sack – The lightest option. Great for organizing clothes and non-abrasive items.
- Ultra-Sil Dry Sack – Slightly thicker and more durable, ideal for regular backpacking trips.
- Lightweight Dry Sack – A bit heavier but far more rugged. Best for gear that sees a lot of wear or rough handling.
All three options are seam-taped, roll-top, waterproof, and highly packable. I personally use Ultra-Sil for most trips and go with the Lightweight line for food or my cook kit.
Bonus uses: pillow, bear hang, food storage
These aren’t just for organization—they’re incredibly versatile:
- Stuff your dry bag with extra clothes to make a camp pillow
- Use it as a bear hang bag with a rock sack and cord
- Store food separately to avoid smells leaking into your other gear
- Even use one to isolate wet clothing from the rest of your pack
For more tips on how I use these systems, check out my full Standard Gear List.
Nite Ize S-Biners: The Tiny Multi-Tool That’s Always Handy
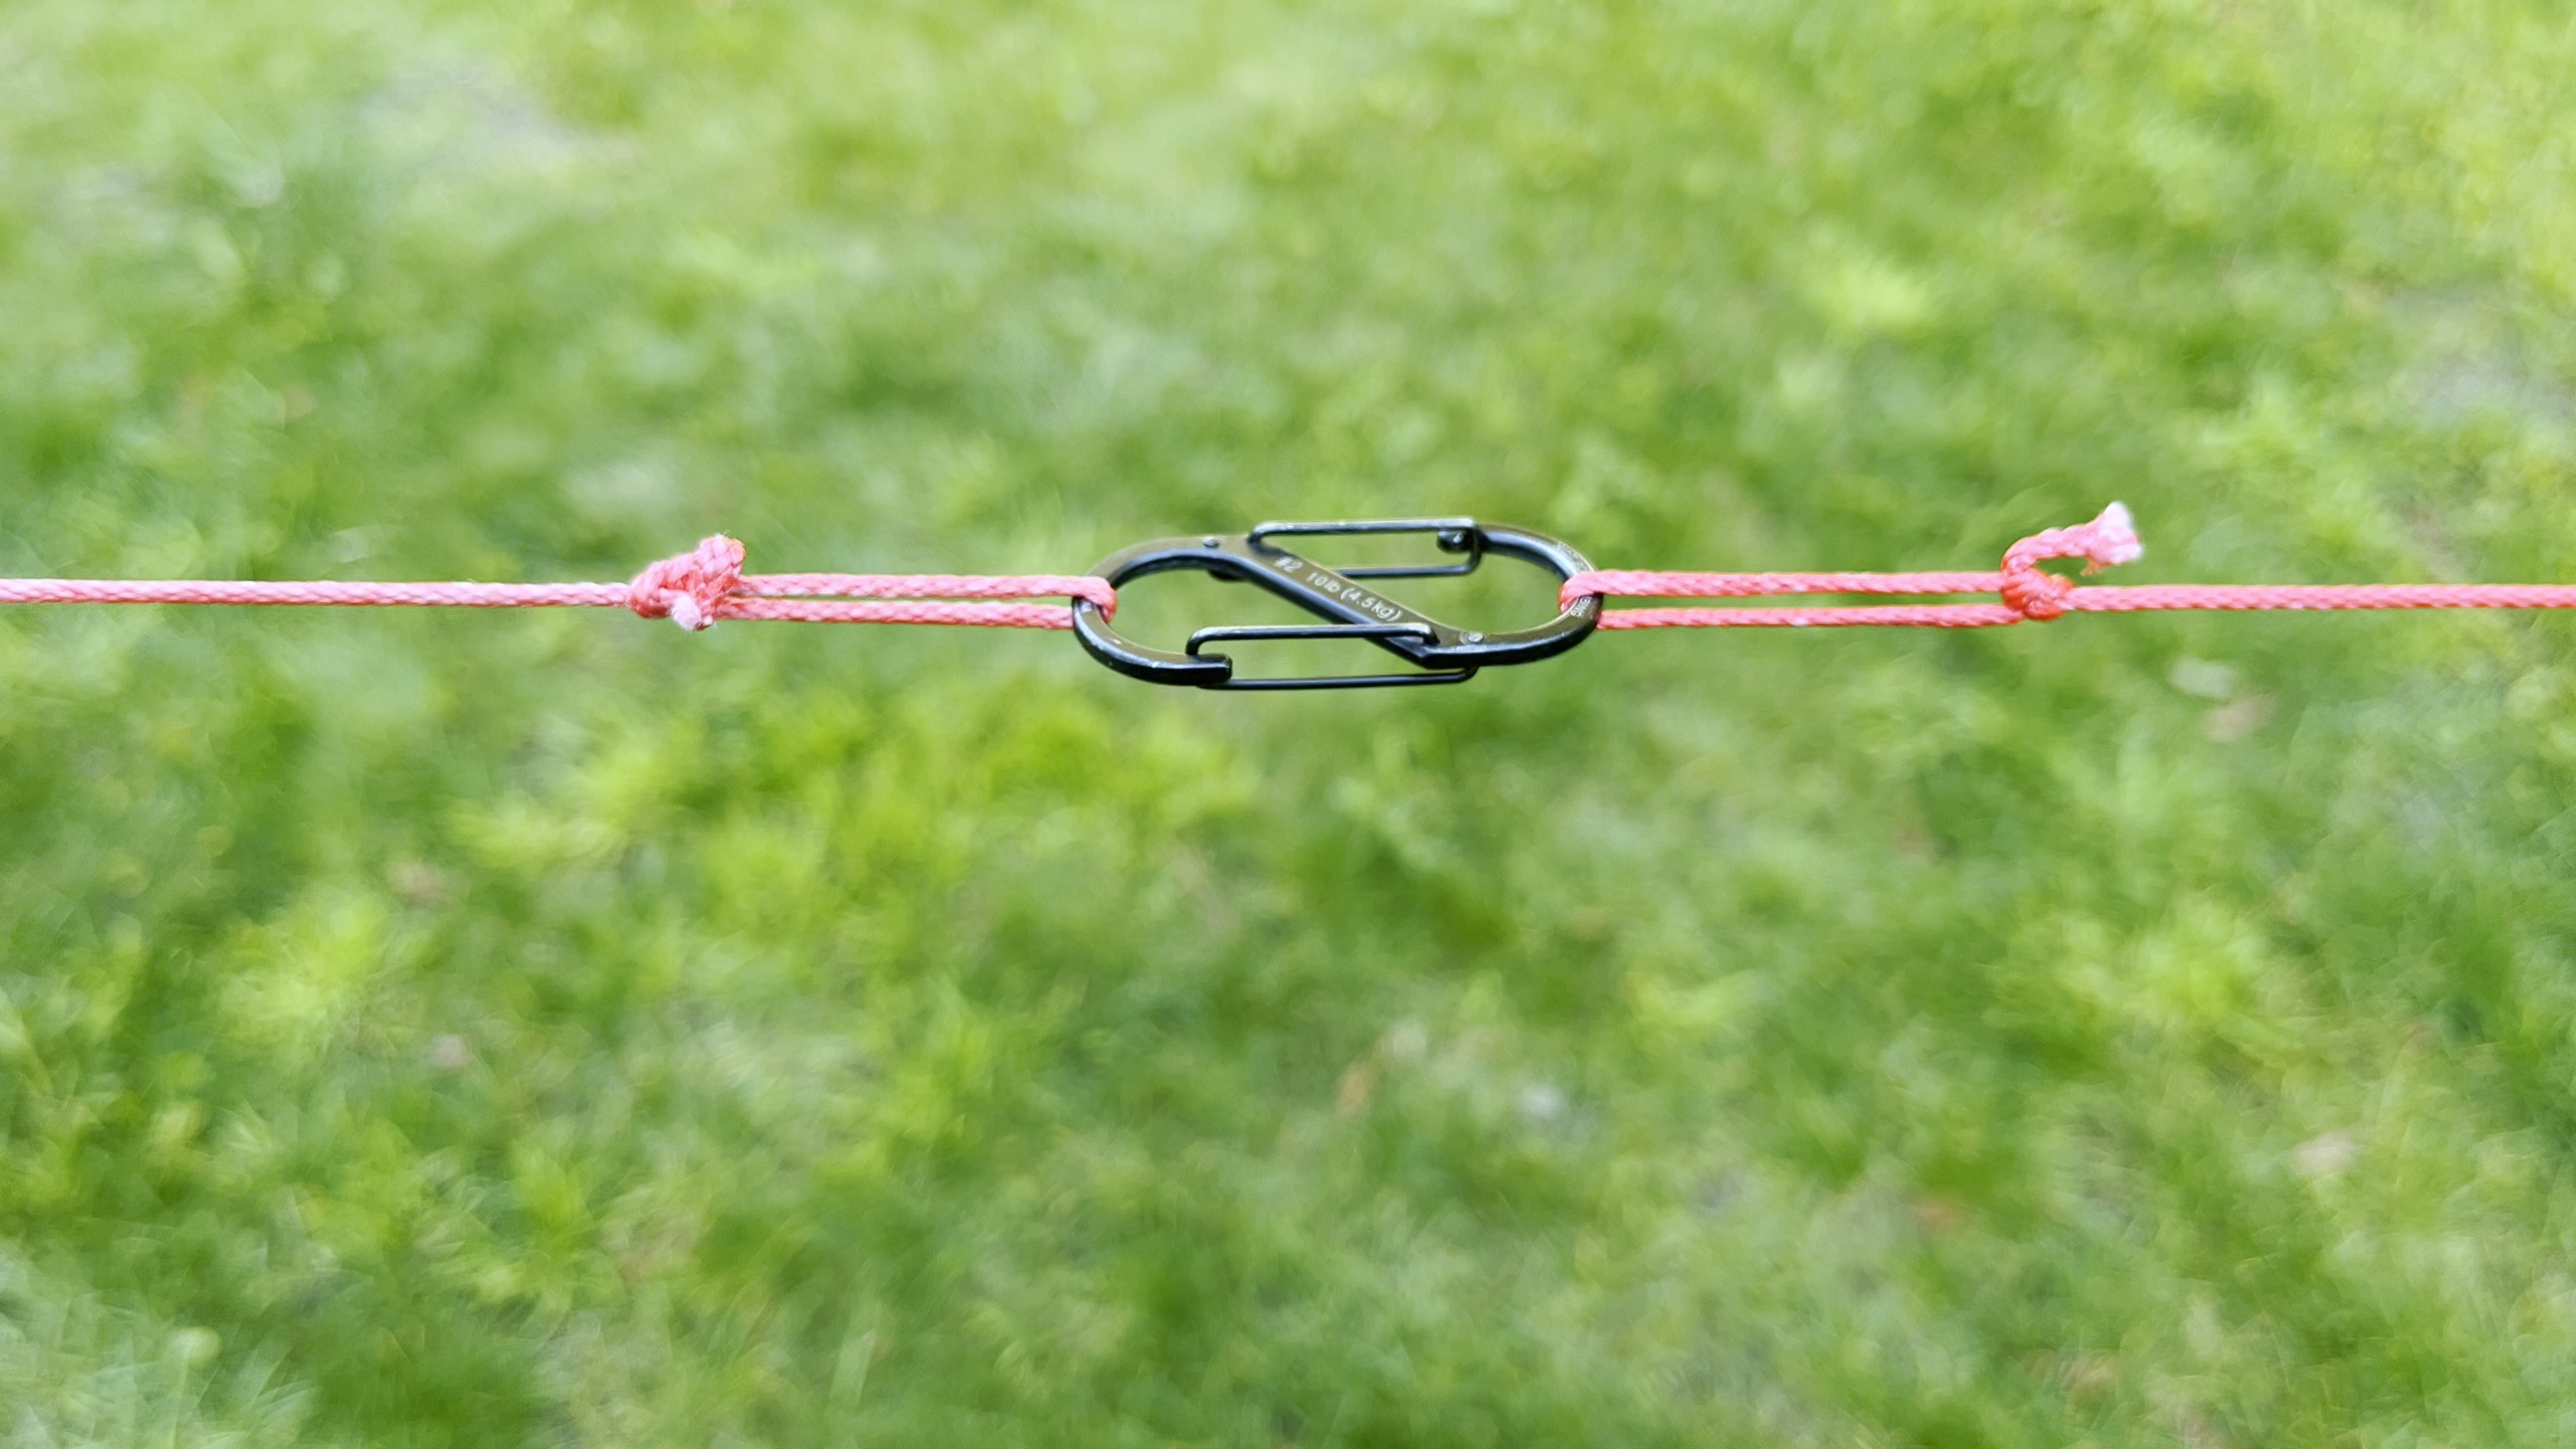
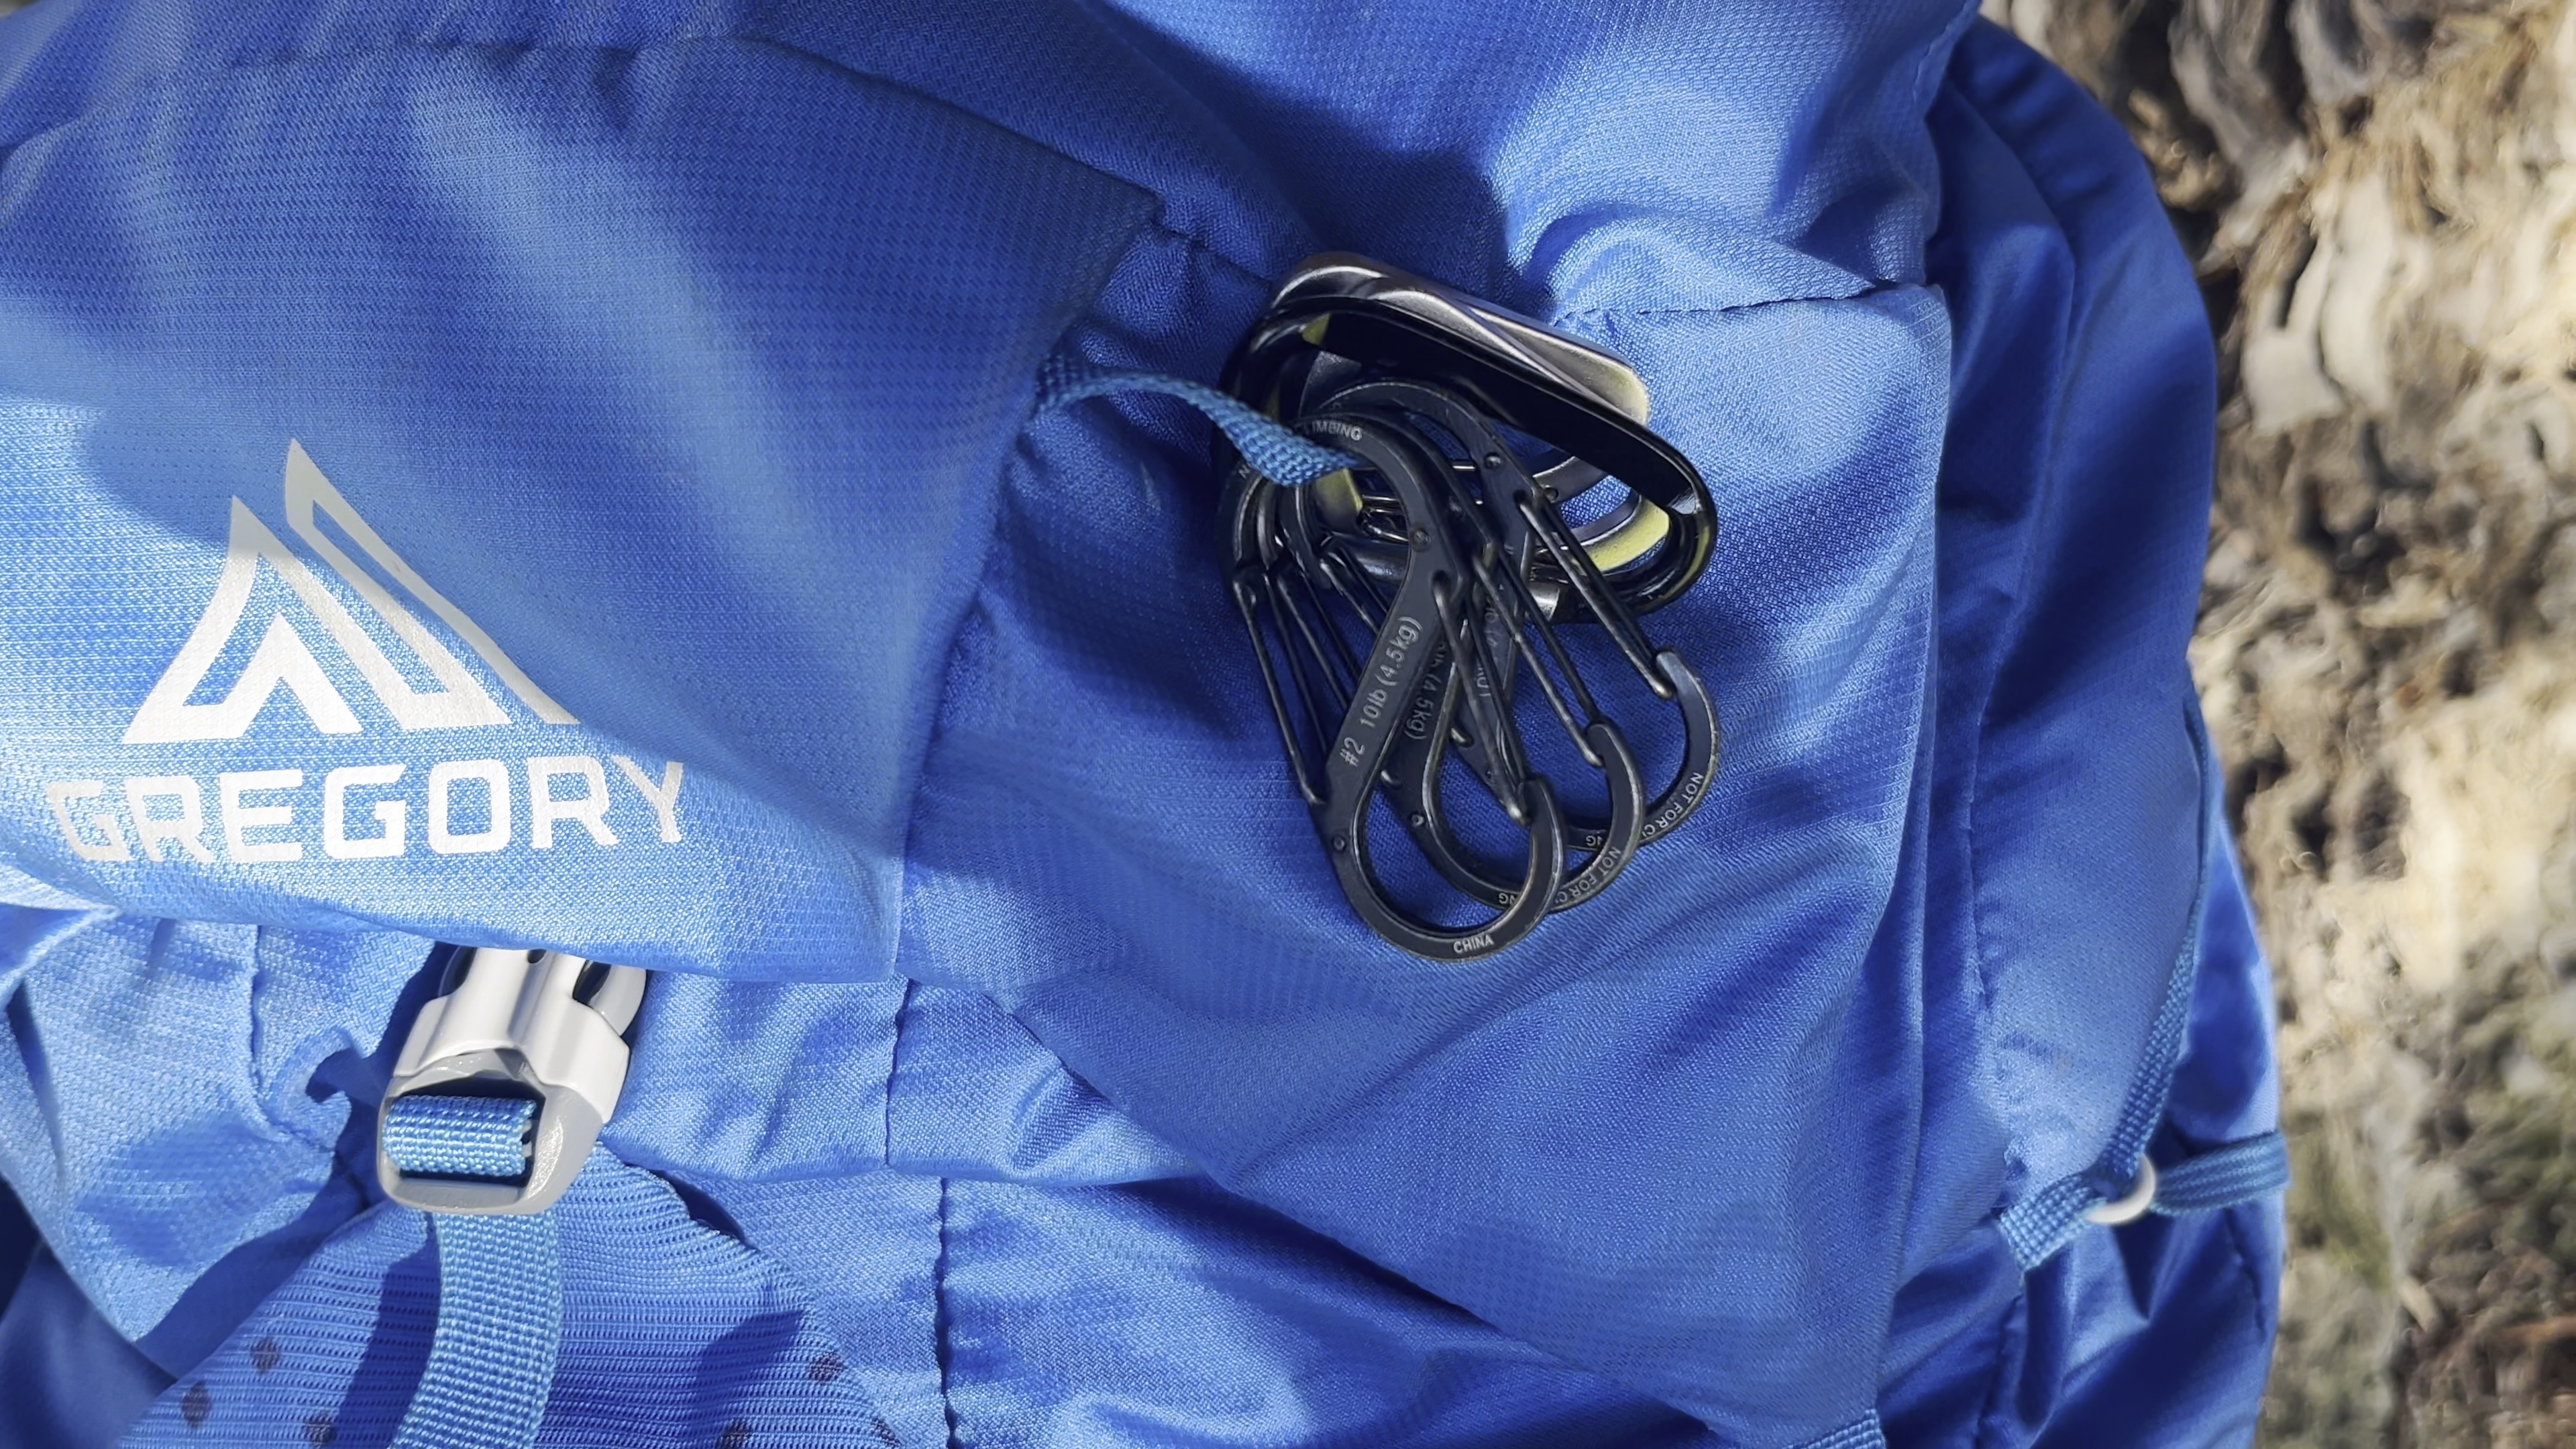
S-Biners are like duct tape for backpackers: once you bring one, you’ll wonder how you ever hit the trail without them. These ultralight, dual-gated carabiners punch way above their weight—offering functionality, organization, and fast-access convenience in dozens of trail situations.
Whether you’re a thru-hiker, hammock camper, or weekend warrior, these little clips can solve a ton of small gear problems with almost no added weight.
How I use S-biners on every trip
I always carry a handful of Nite Ize S-biners on every trip—usually 4–6 tucked into my diddy bag. Here’s how I actually use them:
- Clip camp shoes or a water filter to the outside of my pack
- Hang a food bag quickly without dealing with knots
- Suspend my headlamp from my tent ceiling for hands-free lighting
- Secure a wet rain jacket to my pack to dry on the go
These tiny tools weigh less than a quarter but replace multiple heavier accessories.
Backpacking use cases you might not expect
Beyond the obvious, S-biners have some surprisingly creative uses too:
- Zipper pulls for gloves-on dexterity in cold weather
- Emergency guyline extenders for tarps and tents
- Compass or knife attachment to your shoulder strap for fast access
- Hang your diddy bag or electronics kit inside your tent to keep things organized and off the ground
They’re also a favorite among hammock campers for suspension systems and gear lofts.
Which size and material to get
I carry both plastic and aluminum versions depending on the job:
- Plastic (size #1–#2): Ultralight, perfect for small gear or backups
- Aluminum (size #2–#3): Stronger, ideal for heavier items like shoes or bear bags
They’re cheap, durable, and so useful I keep extras in my glove box and first aid kit too.
For more trail-tested hacks like this, check out my Genius Backpacking Tips.
Final Thoughts on Cheap Backpacking Gear
Not all backpacking upgrades require a credit card meltdown.
Some of the most valuable gear in my pack costs less than $25—and yet, these small additions have made the biggest difference. From keeping my feet blister-free to ensuring my sleeping bag stays dry in a downpour, these cheap backpacking gear items have proven themselves over and over again.
Whether you’re planning your first trip or dialing in your ultralight setup, smart gear choices matter—and price doesn’t always reflect performance.
Big gains from small investments
These five affordable items offer real-world trail improvements:
- No more gritty socks or mid-hike shoe shake-outs
- No more soaked insulation or gear explosions at camp
- No more sitting on cold rocks or digging through a cluttered pack
Blisters avoided, gear kept dry, and less time fumbling for essentials = better trips for less money. That’s a win every time.
Cheap doesn’t mean low quality
It means thoughtful decisions. It means ultralight, multi-use tools that actually solve trail problems without adding bulk—or blowing your budget.
These aren’t just nice-to-haves—they’re trail-tested upgrades that help you stay comfortable, organized, and ready for anything the backcountry throws at you.
So if you’re looking to get more out of your kit without spending a fortune, start here. These items prove you don’t need high-end gear to have a high-quality experience on trail.
Want more tips on dialing in your setup? Visit the Backpacking Gear Guide to see how everything fits together—from the big essentials to the smallest hacks.
And if you’re still building out your kit, don’t miss the Free Beginner Gear Checklist—a great place to start if you’re trying to build a reliable, affordable setup from scratch.
Join Our Community of Adventure Seekers!
Get the latest backpacking tips, gear guides, and trail inspiration sent directly to your inbox.
Sign up to start exploring!
Amazon and the Amazon logo are trademarks of Amazon.com, Inc. or its affiliates.

